How to Melt and Mold Glass at Home—and Get Professional Results


Have you ever picked up a piece of glass lying around the house? Instead of just tossing it in the trash, maybe you wondered, “Hey, what can I make with this?”
The answer is quite a lot.
With a variety of colors and textures, glass is a great material for crafting. One of the most fascinating things you can do with glass is melt and mold it into something beautiful and new.
But you need the right know-how and equipment to do it well.
To get started, check out this intro guide to learn how to melt and mold glass at home—and get professional results.
What Kinds of Glass Can You Melt?
Bottles

You can melt beer, wine, and other bottles you have around. They’re made of soda-lime glass, which has a relatively low melting point (helpful for use with home glassworking equipment).
But first, you’ll need to clean them and break them into small pieces.
Marbles

Marbles with mesmerizing designs are an intriguing material. Like bottles, they’re also usually made from soda-lime glass.
Stained Glass

Colorful stained glass pieces also have lots of potential for attractive designs.
Professional Glass Supplies

Image Source: shop.bullseyeglass.com
Getting glass from professional suppliers is the simplest, but most expensive, way to gather materials for melting and molding.
They’re specifically designed for different types of home glassworking projects. Bullseye and System 96 are among the popular brands of glass supplies.
You can get them in ready-to-melt forms including:
- Rods
- Frits
- Cullet (small pieces)
How to Ensure Compatibility
Here’s one of the biggest tricks with melting and molding glass at home: You need to make sure the glass you have will mold together effectively.
And that has to do with a property called the Coefficient of Expansion.
COE is a measure of how much a glass expands when heated and contracts when cooled. Mixing glass with significantly different COE values can lead to problems such as cracking or breaking when you melt or mold it.
So how can you ensure compatibility?
If you decide to use professional glass supplies, the manufacturer provides this info. If you’re using found glass, you can get a glass identification kit or send samples to a glass testing lab.
Another approach is to do a small test project and observe how your glass pieces behave together. It’s a good learning experience!
Essential Equipment & Tools
1. Kiln
You need an oven capable of producing temperatures high enough to melt glass pieces. Your kitchen oven will not work as a kiln.
Fortunately, purpose-built glass kilns are available for home use.

To protect you and your home, look for a model with safety features, such as Hot Shot glass kilns with Cool-Touch technology. Our kilns provide precise temperature control at the high temps you need. And we’ve got lots of sizes in stock and ready to ship.
Can You Use a Microwave to Melt Glass?
Actually, yes. However … you can’t just throw some glass pieces onto the tray, close the door, and press cook.
You need a separate container called a microwave kiln. It’s a small, inexpensive accessory that fits inside your microwave. You put your glass pieces inside it to help your materials reach the high temps you need for molding.
Depending on the power of your microwave, you may need some patience with this approach. It’s also limited to small projects. Still, a microwave kiln might be worth a bit of experimentation.
Other Options
Also for small projects, it’s possible to use a propane torch to melt and shape glass pieces. But this method takes lots of practice and comes with additional safety precautions.
Particularly ambitious DIY types also experiment with building their own kilns. But that takes a whole different level of expertise and determination.
2. Kiln Accessories
Certain accessories help make melting and molding glass easier and cleaner:
- Kiln shelf — Protects the interior of the kiln and better distributes heat.
- Kiln paper — Protects the shelf and makes it easier to remove glass.
- Kiln wash — Prevents melted glass from sticking to the interior.
3. Safety Gear
Always wear appropriate protective gear when working with hot glass and sharp pieces.
Safety goggles, heat-resistant gloves, and long sleeves are essential.
4. Glass Molds
Depending on your project, you may need various types of molds made from ceramic, stainless steel, or other materials. Obviously, these molds must be able to withstand high heat.
The easiest thing to do is to purchase your molds from a glass art supplier, online retailer, or your local craft store. You’ll find glass molds available in a huge variety of shapes and designs for different types of kiln forming and glass working including glass fusing, glass slumping, and glass casting.
Start with simple shapes such as bowls or plates. Apply kiln wash to ease removal of the glass after forming.
5. Glass Cutting, Crushing, and Finishing Tools
Besides a good hammer to break up found glass pieces, you’ll also want various glass cutters, grozers, pliers, and other tools to shape, arrange, and add finishing touches to your glass art.
Inside the Process of Melting and Molding Glass

Transforming glass takes preparation, patience, and careful attention to temperature. Below are some general guidelines.
The specific parameters you should follow will depend on the types of glass you’re using and your chosen glass forming technique. Talk to a glassworking expert to determine your best approach.
1. Prepare Your Mold and Kiln
Coat your mold (if you’re using one) with kiln wash. Apply kiln paper to your kiln shelf.
2. Prepare and Arrange Your Glass
Make sure your glass is clean and compatible. Arrange your glass pieces in your mold to create the design you envision.
3. Fire It Up
With your mold and kiln shelf loaded, program your kiln to follow the firing schedule recommended for your project. Here’s a general example:
- Ramp up — Raise the temperature at a max of 300 °F per hour up to 1,000 °F. You can increase the temperature faster at that point. But as you near your target temperature, slow the rate of increase to 200 °F / hour.
- For slumping, in which you heat the glass just enough to bend it over the mold, your target temperature will range from 1,200 °F to 1,300 °F.
- For fusing, it’s 1,350 to 1,500°F.
- And for casting, in which you’re more fully melting the glass into a mold, your temperature may be up to 2,000 °F.
- Soak — Hold the glass at your target to ensure it fills the mold completely. This period may last from 10 minutes up to 1 hour, depending on glass thickness and mold complexity.
4. Anneal
We can’t overstate the importance of annealing, which relieves internal stresses created when you melt and mold glass.
To anneal, reduce the temperature in the oven at a controlled rate, usually around 150 °F per hour, down to about 900 °F.
Let your glass sit at that temperature for an hour. Then continue cooling down the kiln slowly to 300 °F.
Finally, turn the kiln off. Let your glass cool slowly to about 70 °F before you remove it from the kiln and the mold.
More about the annealing process
5. Finish
Grind, polish, or add any desired surface treatments. Clean it up and admire your creation!
Key Issues and Tips
Here are some challenges you might encounter as you get into melting and molding.
Cracking Glass
If you find your molded glass is cracking easily, take a closer look at:
- Glass compatibility — Make sure you’re using glass with matching COE. If you’re not sure, you can experiment with a small sample project first.
- Temperature control — Avoid thermal shocks that can weaken your glass. Fire and anneal your projects with gradual, precise ramp-ups and cooldowns.
Over-Firing and Under-Annealing
Soaking your glass too long or at too high a temperature can cause:
- Over-melting — Losing your desired shape
- Distortion — Creating disproportionate results
- Textures — Producing an overly bumpy or smooth surface
Meanwhile, you can’t really over-anneal glass. To make sure your glass is durable, choose the slowest end of your cooldown guidelines.
Kiln Maintenance
A well-maintained kiln not only ensures reliable results but also promotes safety. Regularly clean your kiln’s interior, check heating elements, and calibrate temperature controls.
Neglecting kiln maintenance can lead to uneven heating, temperature fluctuations, or even kiln failure, potentially jeopardizing your creative projects and the longevity of your kiln.
Ideas Your Friends, Family, and Customers Will Melt For
Ready to take on a glass melting and molding project? Here are some ideas to get you started.
Serving Trays

Image Source: annieglass.com
Using food-safe glass, create a fine accessory for entertaining.
Candle Holders

Image Source: Etsy (MayMyGlassBeWithU)
Add to the aesthetics and ambiance of any room with a fused-glass candle holder.
Soap Dishes
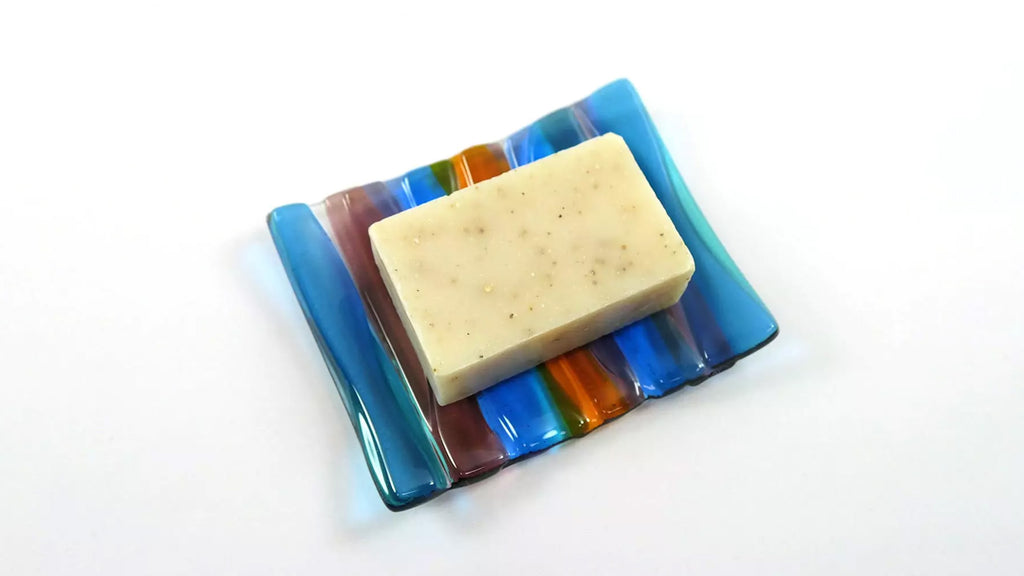
Image Source: Glass Art by Margot
Customize a fresh pop of color and texture for your bathroom.
Jewelry

Image Source: Etsy (Shakufdesign)
Experiment with different colors, shapes, and patterns to design unique pendants.
Glass Tiles

Image Source: realitydaydream.com
Make a one-of-a-kind mosaic backsplash for a home improvement project.
Sun Catchers

Image Source: Glass Art by Margot
Design vibrant, reflective pieces to hang in your windows.
Holiday Ornaments

Image Source: Etsy (SoapAndDish)
Craft beautiful, memorable gifts for special seasons.
Build Your Skills and Have Fun
The world of melting and molding glass at home can be a crafter’s delight. But if you want to get professional results, this discipline will involve a learning curve and some experimentation.
As you delve into these exciting kiln forming techniques, consider taking classes or seeking guidance from experienced glass artists to improve your skills. Above all, enjoy the journey—and take pride in your accomplishments as you create with glass!


